Tag Archives: recipes

Everything Tastes Better a la Mexicana

14 Oct

Since I can’t be physically present for the potluck to benefit our family’s return to the US, and perhaps neither can you, I wanted to share some more recipes. Because food is love, people. Sometimes.

I really wanted to give you guys the recipe for flying ant (chicatana) salsa, but unfortunately, unless you live in this area, you are not going to be able to get the ingredients. Chicatanas are large, flying ants that only come out occasionally during the rainy season- which is drawing to a close here now. Chicatanas are so much better than, and not to be confused with, chapulines. My friend Corrina refers to chapulines as “the spicy crickets” that she was “burping up for days.” (I did finally try the “spicy crickets,” which are actually grasshoppers, last year, because my friend swore they were the good, fresh ones. They were okay. Nothing half as good as chicatanas.)

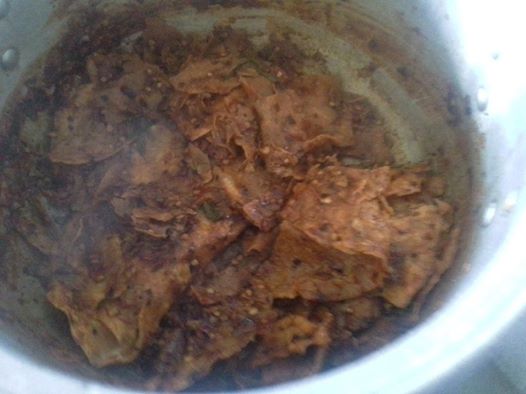
Don’t get chicatanas confused with chapulines, the “spicy crickets”- okay, they’re more like grasshoppers really. Here are chapulines:

Chicatanas appear before dawn with the first big rain of the rainy season (in May), and they are quite a sight to behold. There seem to be hundreds of them swarming around the light post. This year was the first year we’ve seen them come out at our house- because it’s the first year there’s been electricity to attract them to my street. (Woo hoo!) (Yes, I was up as usual before dawn, but I didn’t think to snap a picture.) Everyone runs out to catch as many as they can when chicatanas come out. They are ridiculously easy to catch, but because they only come out of hiding one or two days a year they are very expensive to buy. If you ever happen to be in Oaxaca for rainy season, this is a fabulous food experience.

What chicatanas look like- below- still with wings, and wingless after a quick roasting.


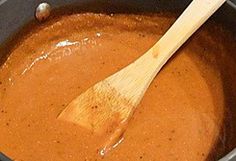
Paulina, my mother-in-law, makes a to-die-for chicatana salsa, but without the main ingredient it’s pretty useless to give you the recipe. Instead, I want to tell you about the easiest trick for Mexican cooking, that I’m pretty sure everyone can use. It’s called “a la Mexicana.” It’s based on the colors of the flag, conveniently correlated to colors of typical staple foods. You might not know the colors of the Mexican flag if you’re not Mexican, because folks only wave their flag around in your face here in the month of September (for Independence celebrations), not year-round like many countries. So I’ll just tell you- the flag colors are green, white, and red. And cooking a la Mexicana means cooking with green chile pepper (jalapeño or Serrano, depending on how spicy you want it), onion (and usually garlic) for the white tint, and of course a red tomato.

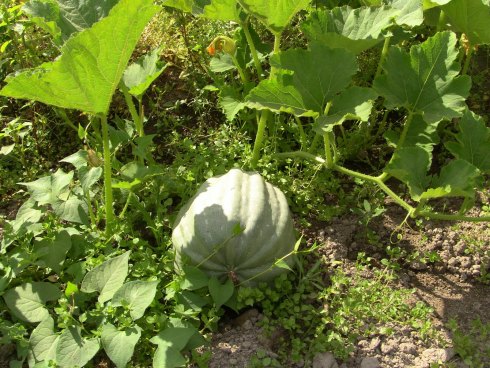
Side note: These are the only local tomatoes available. So you either buy semi-ripe Roma tomatoes that come from who-knows-where, or these. All local tomatoes look like this, except for some cherry-type tomatoes that are around part of the year.

527314_19af4939db6968acc3367e1e456f4372_large

photo from: 

http://pixdaus.com/los-colores-de-mexico-tomates-zapoteca-de-oaxaca/items/view/527314/


167025_145527152171007_776070_n

The Mexican flag outside of the airport in Mexico City


This is the most versatile and handiest thing ever for cooking. You’ve probably heard of huevos a la Mexicana (Mexican-style eggs). It’s the most common a la Mexicana recipe made in the US, and it’s delicious. It’s probably Conan’s favorite. But I love a la Mexicana cooking because I can use it for almost everything. Bored with your usual lentil recipe? Stir-fry your a la Mexicana ingredients in the bottom of the pot and then throw your lentils and water on top. Not sure what to do with those nopales (cactus) you were brave enough to buy? A la Mexicana! (Recipe is below, because I make it a little bit differently than the typical way.) You can make potatoes, beef, or a million other things in this style. Once you’ve tasted the flavor you have a good idea what else it can work with. It doesn’t work with everything, mind you. I can’t imagine beets a la Mexicana, for example. Maybe not broccoli, but certainly cauliflower. Try it and you’ll get a feel for it fast.


dee-nopales

Dee endorses nopales. Okay, maybe not exactly. He did not hate them, at least. That’s close enough to winning over a picky eater.

Here are some nopales (aka cactus):

cactusleaves

photo from this site: 

http://www.tortoiseforum.org/threads/are-all-varieties-of-opuntia-cactus-ok-for-tortoises.17716/

Nopales a la Mexicana, Julia’s style

This is a fabulous side dish. It can be served warm, or you can vary it slightly for a salad. You can also make it a whole breakfast if you scramble some eggs in towards the end of cooking. Well, and you need corn tortillas to accompany it, of couse.

Ingredients:

Nopales (around 6-9 whole fresh- not canned- nopales)

½ medium onion, diced

1 medium clove garlic, minced

2 small tomatoes, diced

1 chile or less-  remove seeds for less heat

Handful of cilantro, chopped


Instructions:

Cut the prickly bits off of the nopales. (Haha! if you lived down here you could buy them already prickly-free. I’m so lucky.) Then make a couple of vertical cuts in the nopal so that it cooks evenly (this is a trick given by my mother-in-law). Cook the nopales on a griddle, or use a sauté pan, without oil. Put however many will fit on your griddle over low-medium heat, for about 4 minutes on one side. Flip over and cook until brownish on both sides (another few minutes). Alternately, you can boil the nopales, but they have a very different texture when boiled; they’re juicier, but some people (like my husband) think it’s a slimy-ish juiciness. I like their flavor both ways, once again proving that I am more Mexican than my Mexican husband. Go figure.

Set cooked nopales aside. When cooled enough to not burn you, cut them into strips about an inch wide and 2 inches long.

Sauté the onion and chile for about 5 minutes. Add the garlic for another minute. Then add the tomato, nopales, and cilantro, and sauté on low-medium heat another 5 minutes, until tomatoes are pretty well cooked.

The end! It’s that easy.

To make it like a salad, cut the nopales into strips about an inch wide and two inches long, and boil for 30 minutes or so. Put in cold water to cool. When cooled and drained, add tomato, onion, cilantro, jalepeño, and radishes (optional)- all chopped/diced according to your salad-eating preferences. Mix with fresh lime juice and salt and ta-dah! A salad version.

Go to the this week’s benefit karaoke potluck extravaganza if you’re in the Louisville area this Sunday. Sing cheesy songs and eat some awesome food! And if you can’t make it, just make yourself something a la Mexicana. Buen provecho! Love, Julia

From Oaxaca with Love, my favorite Seedy Salsa

8 Jul

It’s recipe time- back by popular demand! Okay, really I just got one request, but I aim to please, folks. It turns out that a chef that cooks Mexican food in Gothenburg, Sweden, got turned on to my Oaxacan mother-in-law’s refried bean recipe via my ex-roommate Jeremy from Indiana who’s currently residing in Sweden. (I love this interconnected universe!) So in honor of fabulous roommates now residing in other places, I bring you more delights from small-town Oaxaca.

I’m showcasing one of my favorite salsa this time, partly to share with you lovelies who haven’t been to Mexico an important lesson about Mexican salsa: it’s not all this tomato-jalapeño business like you get with your chips in those “authentic” Mexican restaurants in the U.S. (Shocking, I know.) It’s not even all spicy, although there are usually peppers of some kind involved. Salsa just means sauce- you know, something to add flavor to food. It is a great way to serve more or less the same food about 10 different ways; just change the salsa.

The problem with sharing many of the best Oaxacan recipes is that many of the ingredients are not exported items. You just can’t find chepiles in Kentucky. I’d bet there aren’t any guajes in Sweden, either. With that in mind, this salsa is for the lovely folks of Gothenburg, since I hope you can find these ingredients there.

chiex_2400b5901

Guajes grow on a tree and you eat the softish seeds on the inside of the pod. It’s easy to open the pods, making for convenient snackfood if you have a tree around. (You’re jealous, aren’t you? My guaje tree is better than your convenience store.) You can also make salsa from it, of course.

chepil2

Chepiles- perhaps my favorite food to eat in tamales… They cook down when heated like spinach but are so tender in their flavor. (Don’t let this picture fool you- they aren’t eaten raw.)

This salsa is made out of what we call semillas. Even though semilla is just the generic word for seed, this is the most common snack-food seed in Southern Oaxaca: the seed of calabaza. Calabaza means something like pumpkin or squash. Soft, small summery squash, though, is called calabacita (little squash). You can use the seeds of any hard gourd/squash- acorn squash, butternut squash, any squash or pumpkin with hard seeds.

These seeds are also really good for you, by the way; they’re full of iron, among other things.

Here are some examples of our calabazas (ambigious pumpkin/squash goodness):

img_0215

softer but still not very soft squash “calabaza”

calabazas-mexicanas1

harder, winter-ish squash “calabaza”

semillas

more cheap and delicious convenience food- semillas!

Here, you can just go buy a bag of already-roasted semillas for 5 pesos (pretty cheap).If you can’t buy roasted seeds, it’s pretty easy to roast them yourself. Just separate them from the fleshy part of the squash as best you can- it doesn’t have to be completely separated because the rest will come off easily when they’re dry. Here, they get put directly on the comal (griddle), like so many foods. (Ovens aren’t commonly used unless you’re producing a bunch of bread or something.) A frying pan will do if you don’t have a griddle. Alternatively, you can roast them in the oven.

Space the seeds out a little on your griddle or oven pan so that they’re not on top of each other. Add some salt and toast them (over low heat on the griddle) or roast them in the oven (at 400 degrees Fahrenheit / 200 Celcius) until they’re browned on the outside, turning occasionally. The smaller the seed, the faster they’ll roast.

4789398-el-tradicional-comal-para-las-tortillas

Tortillas roasting over a traditional comal

mex-grocer_1926_30440187

This is more like the comals used on an inside stove, which goes right over 2 burners on the stove. Getting a fire started is okay on a special occassion, but mostly I’m grateful I don’t have to do it every day.


If you want seeds just for snacking, you can also add a little oil and some spices before roasting. I really like mine with some cumin and cayenne pepper (my recipe from back when I used to have to roast them myself, bwahahaha). You can eat them with the shells and all; they’re delicious and nutritious. It’s good to prepare them anytime you are using a squash with edible seeds- less food waste and more healthful snacking for you.

Here’s the recipe for Salsa de Semillas (by Paulina, my badass, feminist, Oaxacan mother-in-law who shows lots of love via what she cooks for us):

mepaulina

Paulina and me on the coast during my first visit, before she was my mother in law

salsa

Paulina showed me how to make salsa in the traditional molcajete on my first visit to Mexico

It’s not meant to be spicy, so if it’s hot for you, use fewer chili peppers.

Ingredients

1 cup roasted semillas (approximately)

10 dry, red, medium-to-low-spicy-level chili peppers- chile costeño is what is used here, but it’s hard to come by outside of here. You can substitute maybe 8-9 chiles del arbol mixed with 1 chile guajillo.

1 (medium to large) or 2 (small) cloves garlic

3 leaves of Pitiona (optional) (apparently known as Bushy Matgrass in English)- If you don’t have this, don’t worry.

water

salt to taste

costeno-rojo-2

chile costeño

44404

Pitiona, a common herb used in cooking and natural remedies here (Sorry, guys, this probably doesn’t grow in your backyard, either.)

Preparation

Step 1: Roast the seeds, as described above, if you are not buying pre-roasted semillas.

Step 2: Roast the chili peppers.

Roast the chiles on a dry griddle or frying pan on low-medium heat, similar to how you roasted the seeds. It only takes a few minutes, though, and you need to move them around on the pan every minute or two. It’s okay if they get blackened a bit, but you don’t want them crispy. You also don’t want tons of smoke from them filling up your house, so keep the heat fairly low and don’t let them get too burnt (and open a window). When they are a little black on each side (more or less- you don’t have to turn them over one by one), put them into some water to soak for about 15 minutes (longer is okay, too, but not necessary- you just want to soften them up for blending).

Step 3: Combine ingredients.

Put seeds, chili peppers, garlic and (if available) pitiona in a blender or food processer. You can also use the traditional mortal and pestle if you prefer (if you are working on your arm muscles, for example). Add a little bit of water to help the blender grind it up, and then add more to make it liquidy. Be careful, though. There is no exact amount of water, but add little bits at a time to get the right consistency. You want your salsa to be thinner than a normal paste but not watery like ketchup or something. It should be somewhere in between. Add salt if needed (depending on how salty your semillas already are).

That’s all! You can enjoy your salsa on any food. We especially love it on eggs and beans (my family’s common breakfast), but it can go on all kinds of stuff: rice, cauliflower- anything that needs a bit of pizzazz.

If you try this salsa, let me know! I want to keep my mother-in-law updated on her worldwide fame in the kitchen. Take care and buen provecho.

48cb3ad33428c2802bc0ce14c82de60e

It should look more or less like this.

P.S. Sorry, y’all, but all the photos are from Google and not me, except for the plastic bag full of semillas and the pics of Paulina and me. I’ll try to do better next time. xoxox

“Authentic” Mexican Recipes- Southern Oaxaca Style

27 Jul

There ain’t no chimichangas around here, as Conan would be the first to tell you. There are no burritos, either, nor do most of the things on your “authentic” Mexican restaurant menu taste like that down here, which is generally a big improvement. (Although I admit, I kind of miss U.S.-style-Mexican-restaurant chiles rellenos, for their cheapness and accessibility if nothing else.) I don’t normally dedicate this blog space to recipes, but lately a couple people have been asking me about salsas and beans, and I thought I could spare some time to share the deliciousness. 

Food down here in Mexico is very regional. For example, people cook a sauce called mole (pronounced moh-leh) in many different states (yes, Mexico also is the United States- of Mexico), but the color and the flavor is very different in each of those places. Food also tends to be extremely fresh and made from scratch, which changes the flavor greatly, as my mom’s partner Dee can tell you, he who is an extremely picky eater but who eats just about anything my mother-in-law, Paulina, puts on the table down here. My best friend Holly will also attest to the from-scratch difference, now that she’s a convert who can’t stand those packaged, reheated corn circles they sell you up there. “Let’s just call them wraps,” she says, frustrated, “because they’re nothing like real corn tortillas. You’ve ruined me,” she says, only a little disappointed, because just the memory of the flavor lasts a good long while. (And here in Oaxaca, tortillas are almost always made from corn, except in tourist places.)

Now, the serving of beans as the accompaniment to just about any meal is based on reality down here. The amount and frequency of bean consumption is pretty impressive; beans accompany nearly any meal nearly any day of the week. They are usually black beans, though; I’ve rarely even seen pinto beans down here. Black beans are a good source of iron, protein, and fiber, fyi, so having them regularly is pretty smart. Sometimes they are just cooked with plenty of broth, like a soup almost. Sometimes they can be a main course- like when you make enfrijoladas, a fried-tortilla and bean dish. You can buy beans that’ve been ground and roasted, called frijol molido,that you just have to cook with some oil and water (the closest thing to fast food around!). Sometimes beans are cooked and then fried (I don’t know why they’re called “refried” there- I guess so you know they’ve been cooked before frying?), which is so delicious and oh-so-easy. And I’m going to give you my mother-in-law’s recipe because I don’t want to hear about you buying canned refried beans ever again. If you want to buy canned beans, so be it- I understand there’s not always time to cook dry beans. But making your own “refried” beans is very fast and totally worth it. Here’s how:

Ingredients:
-Oil for frying
-Beans (black, pinto, kidney- just about any beans will do although black beans are my favorite- can be canned or cooked from dry)
-Onion (approx. 1/4 onion)
-Garlic (2 medium cloves)
-Salt
-Cilantro or Epazote or Hoja de Aguacate (Avocado Leaf?) (optional). Cilantro is pretty easy to
get fresh but epazote might be a bit more challenging. Hoja de Aguacate you can probably find in your local Mexican store in dry form, which works just fine. This is just for added seasoning and is not necessary (but will add to the deliciousness).

Instructions:
Put 1/2 inch oil in the bottom of your pan (fairly large skillet) and heat on medium heat. Cut onion into fairly large pieces- it’s not important how you cut it or that it be small, just not one big chunk. Add onion to hot oil, moving occasionally, until it is browned and somewhat burnt. Remove onion from pan and throw it out. Now, this serves the purpose of giving the oil the flavor of cooked onion without having the onion in there. If you are very partial to having chunks of onion, cut the onion in the size you’d like to eat, and don’t fry it quite so much.
Add chopped garlic to the oil, frying for just a minute or two, moving frequently so it doesn’t burn. Then add the beans along with some of the broth from the beans. How much? It doesn’t matter too much- one or two cans of beans, about 3 cups of cooked beans, enough liquid to make it a little soupy looking at first. Turn up the heat a little.
Add in some salt to taste and any other seasoning (cilantro, etc.). Then mash the beans! You can use a potato masher if you have one, or use the bottom of a cup (heavy plastic or very solid glass like a coffee mug- don’t get too excited if you’re using glass!). You don’t have to mash them into oblivion- the idea is just that the beans soak up the yummy oniony-oily-garlicky flavor. Stir them some and let them cook a bit, too, so most of the liquid gets evaporated/mashed with the beans. They don’t have to cook for very long, you can cook them till you get the consistency you want. This is why the amount of liquid doesn’t need to be exact- if you put in too much you just let them cook a little longer. And voila! Ready to serve.

Now, another fabulous thing about food here in Oaxaca is that it’s not all spicy, but there is almost always salsa of some sort or another. Salsa really just means sauce and there are many, many, many different kinds, depending on what kind of chile pepper you use, how you cook it (roasted, boiled, etc.), how you process it (chopped up, in a blender, hand-ground), what other ingredients you use (tomato, lime, onion, garlic, and much more). I initially wanted to do a blog piece on salsa recipes, but realized it could take me weeks to write down the ones I know. So I decided to stick to my favorite salsa, which I now use (thanks again to Paulina) for one of my favorite Mexican foods (also the BEST hangover food ever), chilaquiles (pronounced chee-luh-keel-ehs).

chilaquiles

chilaquiles finished product, served with over-easy eggs, avocado, diced onion and queso fresco on top, sour cream if desired… grease and spice and carbs and protein and fat, perfect to get you going after a night on the town

The bad news is this salsa is best made with a chile that I think is hard to get in the U.S., at least in Kentucky, which is not a hot-bed of Oaxacan immigrants, like, say California is. The chile is called chile costeño (coastal chile), but I think that you can substitute something like chile de arbol, a nice red dry chile with good flavor and decent spice (and you can definitely find chile de arbol at your local Mexican store- you can even find it at Valumarket if you live in Louisville). Cayenne could work, too, but I think it’s a bit hotter than chile costeño, so be careful if you decide to substitute with that! And really you can use any hot pepper that you so desire for chilaquiles (before moving down here I made them with a jalepeño and tomato salsa- it works, but it’s not as good as this). So, here it is:

For salsa:
Ingredients:
-chile costeño or chile de arbol or whatever hot pepper you’re going to use (How much? Haven’t you realized by now that I hate measuring? If you’re using it for chilaquiles you need several handfuls, if you just want to drizzle some on some other food you can use a bit less, although this salsa will hold up well for a good long while since it’s pretty much just hot peppers.)
-3 cloves garlic, or less if not using as many chiles
-salt to taste

Yep that’s it! It’s pretty much pure chile salsa with some garlic. Yum.

costeño salsa

Roast your chiles in a dry frying pan (or on a comal/griddle if you have one). Open all your windows before doing this because it will make you cough your lung out if you’re just standing there in front of the roasting chile. Move them around a bit so they toast on both sides. If it gets a little black that’s okay, you just don’t want to burn it down to ashes.
comalmy comal, still with chile seeds on it

2. Soak the chiles in water for a little bit so they get softer and easier to grind up in the blender. Put the garlic, some salt, and chiles in the blender with just a little bit of water. You want enough water to be able to blend it, but not much more or it won’t turn out. Blend until well pureed- ideally you want even the seeds blended in there well (which would take all day with my hand-cranked blender, but ye who have electricity have no excuse). Check the amount of salt and you’re finished.

chile costeño soaking

For chilaquiles:
Chilaquiles is a dish in the same vein as french toast; the idea is to re-purpose ingredients when they’re no longer at their peak but before they’ve gone bad. Instead of bread, you’re salvaging corn tortillas once you’ve already reheated them and they’re not soft and pliable anymore. So, yes, you can do like Mexican restaurants in Kentucky do and just use tortilla chips, but that defeats the purpose and it just doesn’t taste as good. When I lived in Kentucky, I would put my leftover tortillas (the extra ones I’d heated up for a meal but nobody got to) in a bag in the back of my fridge until I had 8-10 tortillas (good for 2-3 people, depending on size of tortilla and hunger level). You can also use a fresh package of tortillas- they don’t have to be stale tortillas, especially since it’s not like the ones you’re buying at the store there are super fresh to begin with. Here’s what else you need.

Ingredients:
-tortillas (for taco-sized tortillas, count on maybe 4-5 per person?)
-salsa (see above)
-oil for frying

(for serving, optional but highly recommended):
-chopped red onion
-chopped cilantro (optional)
-avocado
-queso fresco (or any cheese will do, but this is our preference- available at Mexican stores and many other grocery stores. However, some queso frescos are not so delicious- in that case it’s better to just get some jack cheese or some other mild equivalent.)
-sour cream (especially helpful for calming down the spiciness)
-eggs or other preferred protein accompaniment

(Yikes, I just made these for breakfast and already want them again. Writing is so hard!)

Directions:
1.    Fry tortillas in a decent amount of oil. This is not a breakfast for dieting. You will probably need to fry them one or two at a time so they brown well on both sides.
Heat the salsa in a large pan. You can add in a tiny bit more oil and a little bit more water, depending on the consistency of the salsa. Add in tortillas one at a time, flipping them in the salsa so that they’re well coated. You can break them into pieces as you put them in, or they usually break up pretty well on their own as you stir them around. Do not add in too many tortillas if you don’t have enough salsa- if your tortillas are dry the dish is no good. Better to either make more salsa or use fewer tortillas- better to add more accompaniments to the dish than have gross chilaquiles.

chilaquiles in the potfried tortillas mixed with the salsa

2.    Let the tortillas cook and soak up the salsa for a couple minutes (not too long or they’ll dry out) and you’re good to go. Fry up your eggs, get all the other bits and pieces on the table and you’re ready to eat. Don’t forget to invite Conan and me over!